Users management
Contents
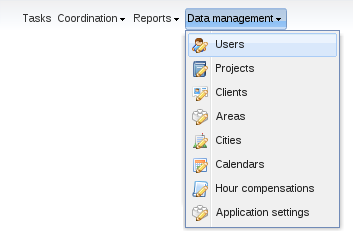
PhpReport provides an interface to create, edit and remove users, and assign their hour cost, journey, area membership and city residence data. It can be accessed from the Data management menu, section Users.
Create, edit and delete users
In the Users management screen you will see a grid containing all the users, sorted by login by default; this can be changed pressing on the corresponding column.
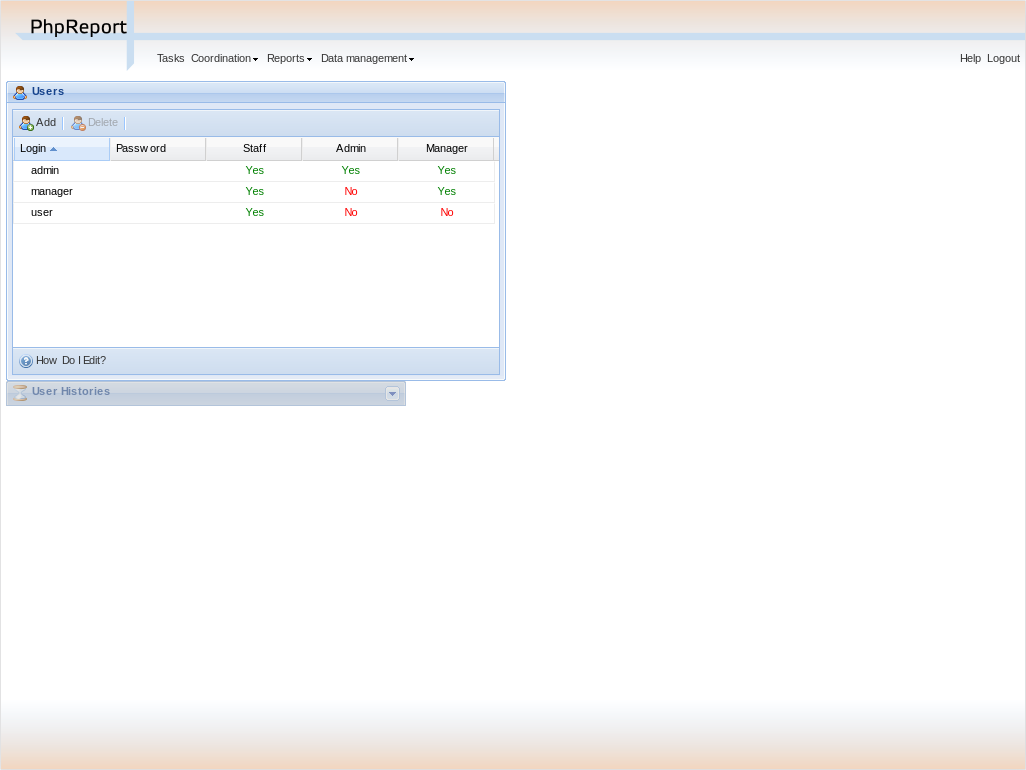
To create a new user you must use the Add button located above the grid, and to edit an existing user you must double-click on the corresponding row.
In both cases, the following inline edition row will appear:

In the row you must enter the data of the user:
- Login:
- User name, to be used in the login screen and to appear in the reports.
- Password:
- Password to be used in the login screen.
- Staff:
- Belonging to the staff group. Activating it the user will be able to login, fill tasks in and check some reports. In particular, they will have access to User tasks, User details, Accumulated hours and Project details, only of those projects they are assigned to.
- Manager:
- Belonging to the manager group, users will have access to all kinds of reports, as well as using the User filter in the User tasks report to chose any other user.
- Admin:
- Belonging to the administrators group. Activating it the user will be able to use the screens under Data management section: manage projects, users, etc.
Permission levels are meant to be stacked; e.g. it doesn't make sense to have a Manager user that doesn't belong to the staff group too.
Tip
If LDAP authentication is set, you won't be able to edit these user data. Besides, columns Staff and Admin may not appear, and the names of the groups in the LDAP server would appear instead.
To delete a user you must select it with a single click on the corresponding row and use the Delete button located next to Add button. You will be asked for confirmation before actually trying to delete. Users who have been assigned to some project, or who have already entered some tasks, won't be allowed to be deleted. You have to remove existing assignations or tasks and try the deletion later.
Setting the hour cost for a user
The hour cost for a user will be used to calculate the Total cost for a project, taking into account the time every user has contributed to that project. The total cost of a project can be checked in the Project evaluation report.
Hour cost may vary with time, so you will have to enter an Init date and End date for every value of hour cost in PhpReport. You can do it in the Users management screen, selecting one user (doing a single click on a row) and expanding the panel named User Histories located below the users grid. The first tab in this panel corresponds to Hour Cost:
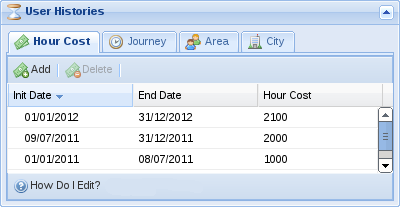
As you can see, every row has three values: Init date, End date and Hour Cost. To create a new row, you must use the Add button, and to edit a row you must double click on it. In both cases an inline edition row will appear and you will be able to enter the three values. Once you have entered them you can Accept to save the changes. To delete a row you must select it with a single click and use the Delete button.
Warning
Overlapping time periods among different rows are not allowed.
Setting the journey for a user
The journey is the number of hours the person is supposed to work for every working day. Working days in PhpReport are Monday to Friday. This value will be used to calculate the balance of Extra hours for a user, as well as the corresponding amount of Holiday hours. These values can be checked in the Accumulated hours report.
This value may vary with time (e.g. a user may change from full time to part-time dedication for a specific period of time), so you will have to enter an Init date and End date for every value of user journey in PhpReport. You can do it in the Users management screen, selecting one user (doing a single click on a row) and expanding the panel named User Histories located below the users grid. The second tab in this panel is Journey:
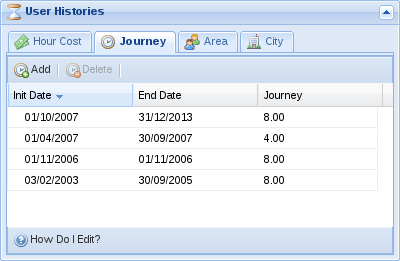
As you can see, every row has three values: Init date, End date and Journey. To create a new row, you must use the Add button, and to edit a row you must double click on it. In both cases an inline edition row will appear and you will be able to enter the three values. Once you have entered them you can Accept to save the changes. To delete a row you must select it with a single click and use the Delete button.
Warning
Overlapping time periods among different rows are not allowed.
Setting the area for a user
Areas are the way to translate a department structure to PhpReport; you can assign a user to an area for a defined period of time. Like in the previous values, you will have to enter an Init date and End date for every value of user area in PhpReport. You can do it in the Users management screen, selecting one user (doing a single click on a row) and expanding the panel named User Histories located below the users grid. The second tab in this panel is Area:
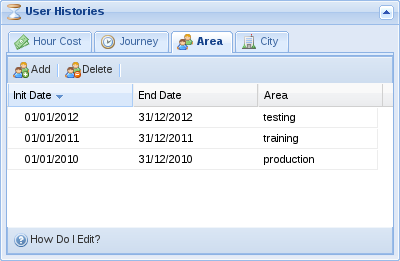
As you can see, every row has three values: Init date, End date and Area. To create a new row, you must use the Add button, and to edit a row you must double click on it. In both cases an inline edition row will appear and you will be able to enter the three values. Once you have entered them you can Accept to save the changes. To delete a row you must select it with a single click and use the Delete button.
Warning
Overlapping time periods among different rows are not allowed.
Setting the city for a user
Users may be assigned to a city. The city has influence in the working days of users, because they translate the public holidays of every city to user hours accountability. Public holidays work like weekends: users are not supposed to work in those days, and when they do, the hours are accounted as extra hours.
This value may vary with time (e.g. a user moving to a work center located in a different city), so you will have to enter an Init date and End date for every value of user city in PhpReport. You can do it in the Users management screen, selecting one user (doing a single click on a row) and expanding the panel named User Histories located below the users grid. The second tab in this panel is City:
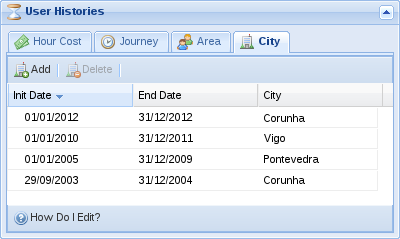
As you can see, every row has three values: Init date, End date and City. To create a new row, you must use the Add button, and to edit a row you must double click on it. In both cases an inline edition row will appear and you will be able to enter the three values. Once you have entered them you can Accept to save the changes. To delete a row you must select it with a single click and use the Delete button.
Warning
Overlapping time periods among different rows are not allowed.
Setting user custom goals
Goals are used to fulfil specific accumulated hour goals per user in a specific period of time. Every goal will have Init date, End date and Extra hours: dates actually refer to the week they belong, e.g. setting Init date to Monday or Thursday of the same week makes no difference; the Extra hours field is the number of accumulated hours that a user must have in the specified period to fulfill the goal, it should be equal to the value of worked hours minus workable hours between Monday of the init date week and Sunday of the end date week.
The weekly goal value in the User work summary shows how many hours they should work every week to fulfil their goal when they reach the end date. The value will vary every week according to how far or close they are to fulfill their goal.
When no custom goal is set, users will get a default goal. The default goal starts on the beginning of the year, on the user journey start date or on the end date of a previous custom goal, whatever is more recent; it ends at the end of the year, the end of the journey or the beginning of a future custom goal, whatever is closer in time. The extra hours value of the default goal is 0. For the most common cases, a default goals is equivalent to setting 1st Jan as init date, 31st Dec as end date and 0 as extra hours.
Filling long leave periods for absent users
Sometimes, an admin needs to fill long periods of sick leave or other kinds of leaves for an absent user. There is an interface to accomplish this, it can be accessed from the Data management menu, section Long leaves.
You need to fill in the following data:
- Type of leave:
- The project the leave will be assigned to. To have projects listed here, they need to have been saved with the project type "leave" in the Projects management area.
- User:
- User the leave will be assigned to.
- Start and end dates:
- When the leave will start and end. One task will be created for every day between those dates, excluding weekends.
- Description:
- Optional text to be added in the task description.
Warning
Make sure the details are correctly filled as there is no interface to remove multiple leaves at once.
This file is part of PhpReport 2.22-126-g762ba97a documentation. Generated on Wed 12 Jul 2023 05:04:53 PM UTC